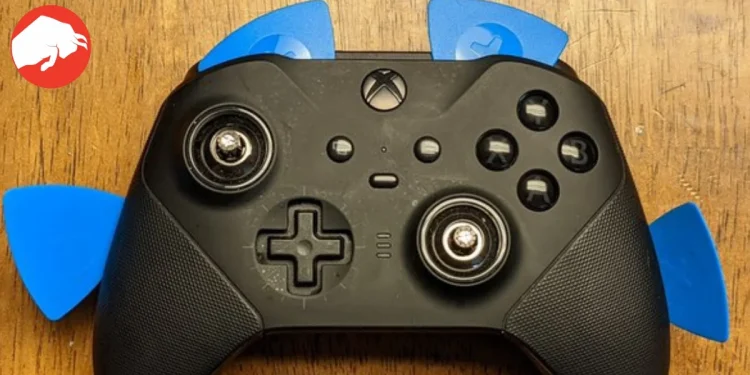
For gaming enthusiasts and DIY repair buffs, the Xbox One controller is more than just a gaming accessory; it’s a gateway to enhancing the gaming experience through customization and repairs. While the thought of disassembling your controller might seem daunting, it opens up a world of possibilities for personalization and troubleshooting. Let’s dive into the step-by-step process of taking apart your Xbox One controller, ensuring you can tackle maintenance, customization, or repair with confidence.
Step 1: Preparing Your Controller for Disassembly
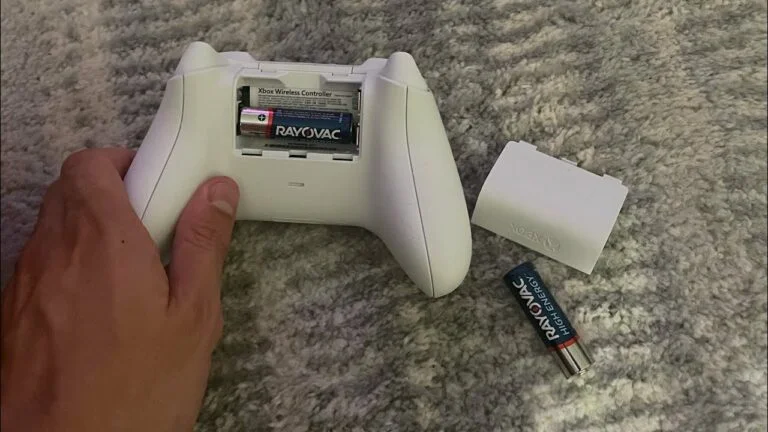
The first step in this adventure is to ensure your controller is ready to be taken apart safely. This involves removing the batteries to prevent any electrical issues. Start by gently taking off the battery cover and removing the batteries. This simple act is your gateway into the inner workings of your Xbox One controller, paving the way for further exploration and modification.
Step 2: Gaining Access to the Controller’s Heart
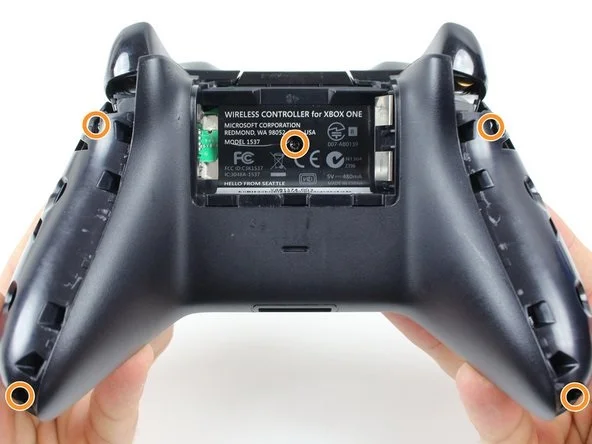
With the power source removed, the next phase involves delving deeper into the controller’s structure. The side plastic covers, snugly fitting on either side of the controller, are your next targets. Using a plastic spudger tool, carefully pry these covers off to reveal the screws that hold your controller together. This step not only requires patience but also a steady hand to avoid damaging the aesthetic components of your controller.
Step 3: Exposing the PCBs
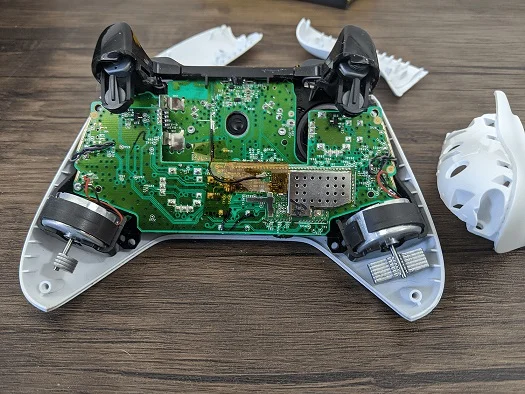
Upon removing the side covers, the screws that secure the controller’s integrity are exposed. Unscrewing these with precision allows you access to the controller’s PCBs (Printed Circuit Boards), the electronic heart that translates your gaming commands into actions. This step is crucial for those looking to clean their controller’s internals, troubleshoot hardware issues, or replace components. Remember to keep the screws in a safe place; you’ll need them later.
Step 4: The Deep Dive into PCB Removal
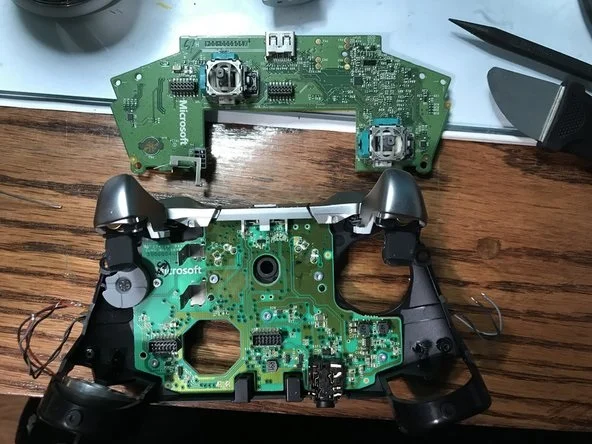
For gamers keen on electronics or in need of replacing the PCBs, this stage is where your technical skills truly shine. Detach the ribbons and unsolder the wires connecting the PCBs with utmost care. This step is delicate and requires a good understanding of electronics to avoid damaging your controller further. Gently remove the PCBs, and you’ll find yourself looking at the core that powers your gaming actions.
Navigating Common Challenges
Throughout this process, you might encounter stuck screws or the fear of damaging delicate parts like the plastic hinges. It’s essential to proceed with caution and patience. If screws are stuck, gently work them loose without force. For those worried about causing damage, remember that disassembling electronic devices is a careful dance between curiosity and caution.
the plastic hinges thang is annoying when it comes to disassembling the current new game controllers.. ps4 dualshock4s and xbox one controllers sort of share the same issue.. xbox one controllers? the 2 snapped in parts that cover the screws.. I think a plastic hinge breaks. pfft
— (•φ) Jeffrey J. Castillo (@jjcastillo__) August 31, 2019
FAQs: Your Disassembly Companion
What if I encounter stubborn screws?
Take your time, and consider using tools designed for electronics to gently coax them open. If a screw is damaged, it may need to be replaced to ensure your controller can be reassembled correctly.
What should I avoid during disassembly?
Avoid rushing or using excessive force. The internal components of your Xbox One controller are delicate and can be damaged if handled improperly.
How do I manage the wires and ribbons?
Unsoldering requires a steady hand and a basic understanding of electronics. If you’re unsure, seeking professional assistance or guidance from online tutorials can prevent damage.
The Path to Controller Mastery
Disassembling your Xbox One controller is a journey that offers insight into the engineering marvel that enhances your gaming experience. Whether you’re aiming to fix a sticky button, clean internal components, or customize your controller, understanding its internal structure is invaluable. Just remember, the path to controller mastery is paved with patience and precision.
This guide offers a comprehensive overview of disassembling your Xbox One controller, from preparation to the careful removal of PCBs. By following these steps, you’re not just taking apart a piece of hardware; you’re unlocking a new level of engagement with your gaming gear.


